This is a more ambitious piece from the ‘Neo-classical’ master Jacques-Louis David.
‘The Courtship of Paris and Helen’ represents an event from antiquity. The main scene is an interior space with a single vanishing point perspective. The key elements in this painting are the Paris and Helen couple, the four Carytids (statues), the cloaked partition wall, the ornamental pillar and the brazier.
A start had been made many years back. Here, I have to make corrections and readjustments to the earlier sculpts. The key technique employed here was to actually paint in the shadows to recreate the scene for viewing under artificial lighting. The construction of this shadow-box diorama is told through the accompanying photos.

Fig 1. The Courtship of Paris and Helen by Jacques-Louis David (1788). The painting is now in the Louvre Museum, Paris. The painting was commissioned by the comte d’Artois just before the French Revolution.
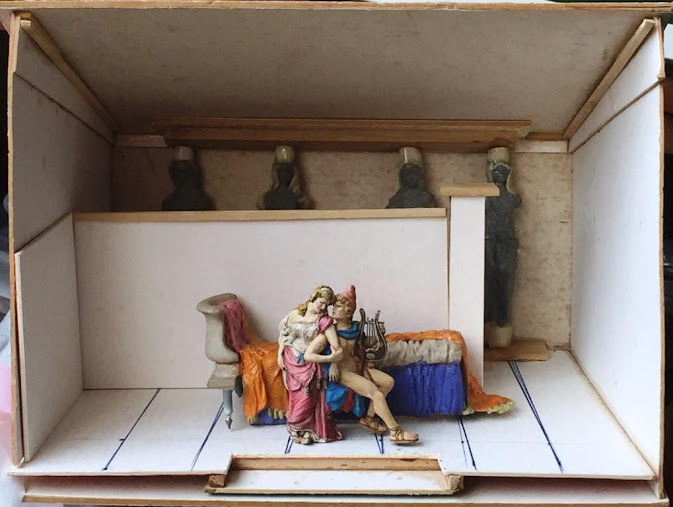

Fig 2. A box of suitable depth was made to fit an A4-sized Ikea picture frame. A room setting with false perspective was constructed with angled walls, ceiling and flooring to appear to emanate from a single vanishing point. The room was inserted into the box. Some of the key elements – the figures, the bed and the four statues were salvaged from an earlier project. A step pool feature was added. The room, the partition wall and post were made from cardboard and basswood.

Fig 3. The drapery outline was sketched in and then sculpted with putty.


Fig 4a & b. Detailing was added to the drapery, the partition wall and post.

Fig 5. The floor tiles were scored. The interior was sprayed with matt white prior to painting.


Fig 6a & b. The ornamental pillar and quiver case were made from tubing. The statue and griffins on each end of the stand were sculpted.


Fig 7a & b. After studying the painting carefully, the bed was completely re-sculpted as to the headstand, the mattress and the drapery.

Fig 8. The scene and elements were painted. Shadows were added to the background. A door frame was cut out, painted and glued between two carytids to represent the back door. Garlands were added to the carytids. This picture was taken under strong sunlight to show the intended brightness of the scene with a LED light. Hence note the painted shadows to create an atmospheric effect.


Fig 9a, b & c. Modelling the brazier did not appear to be an easy task. However, after thinking about the problem for a while, a Historex pan was glued onto a suitably sized plastic tubing. Putty was liberally squashed into the underside and levelled by pressing against a flat surface to create a firm base for attachment. Three thick wire stands were cut and manipulated into the desired shape. These were then attached to the base of the item above thru pre-drilled holes. The swan necks were made from smaller bent wire and superglued into position. Then more putty was added to sculpt the swans. A triangular base and some wispy cotton smoke were added to the brazier.


Fig 10a & b. Previously sculpted as a pair, further detailing work on Paris and Helen included elevating the figure of Helen, adding the chair legs, adding a foot rest and extending Paris' right foot. More drapery was sculpted on the chair and the left hand of Paris was also later substituted.

Fig 11. Water spouts were added to the pool. The spouts were made from brass tubing and the water flow was a bent fibre-optic cable superglued into place. Gloss varnish was added to the water. All the elements were carefully placed within the diorama. This is the scene before it was covered with the glass frame.

Fig 12. An LED light strip with connector switch was installed and the frame was added to the box.

Fig 13. The completed diorama with LED lights. A simple coloured filter was placed over the lights to create suitable lighting.


